In this blog post, I will teach you how to use the VD4H (velocity) feature of Groove Builders to give your beats the best hi hat bounce.
The possibilities with VD4H are endless.
Here's what you'll need:
-
Groove Builders (if you haven't already pick some up, you can find them here. You'll get a tutorial video on how to use them in your DAW.).
- A sampler plugin that supports multisamples (or layered samples) (e.g., Battery 4, the FPC in FL Studio, Logic’s Sampler (formerly known as ESX24), Ableton Live's Sampler, Kontakt 6, etc….
For this post, I use Battery 4. The concepts described here can be applied to similar samplers.
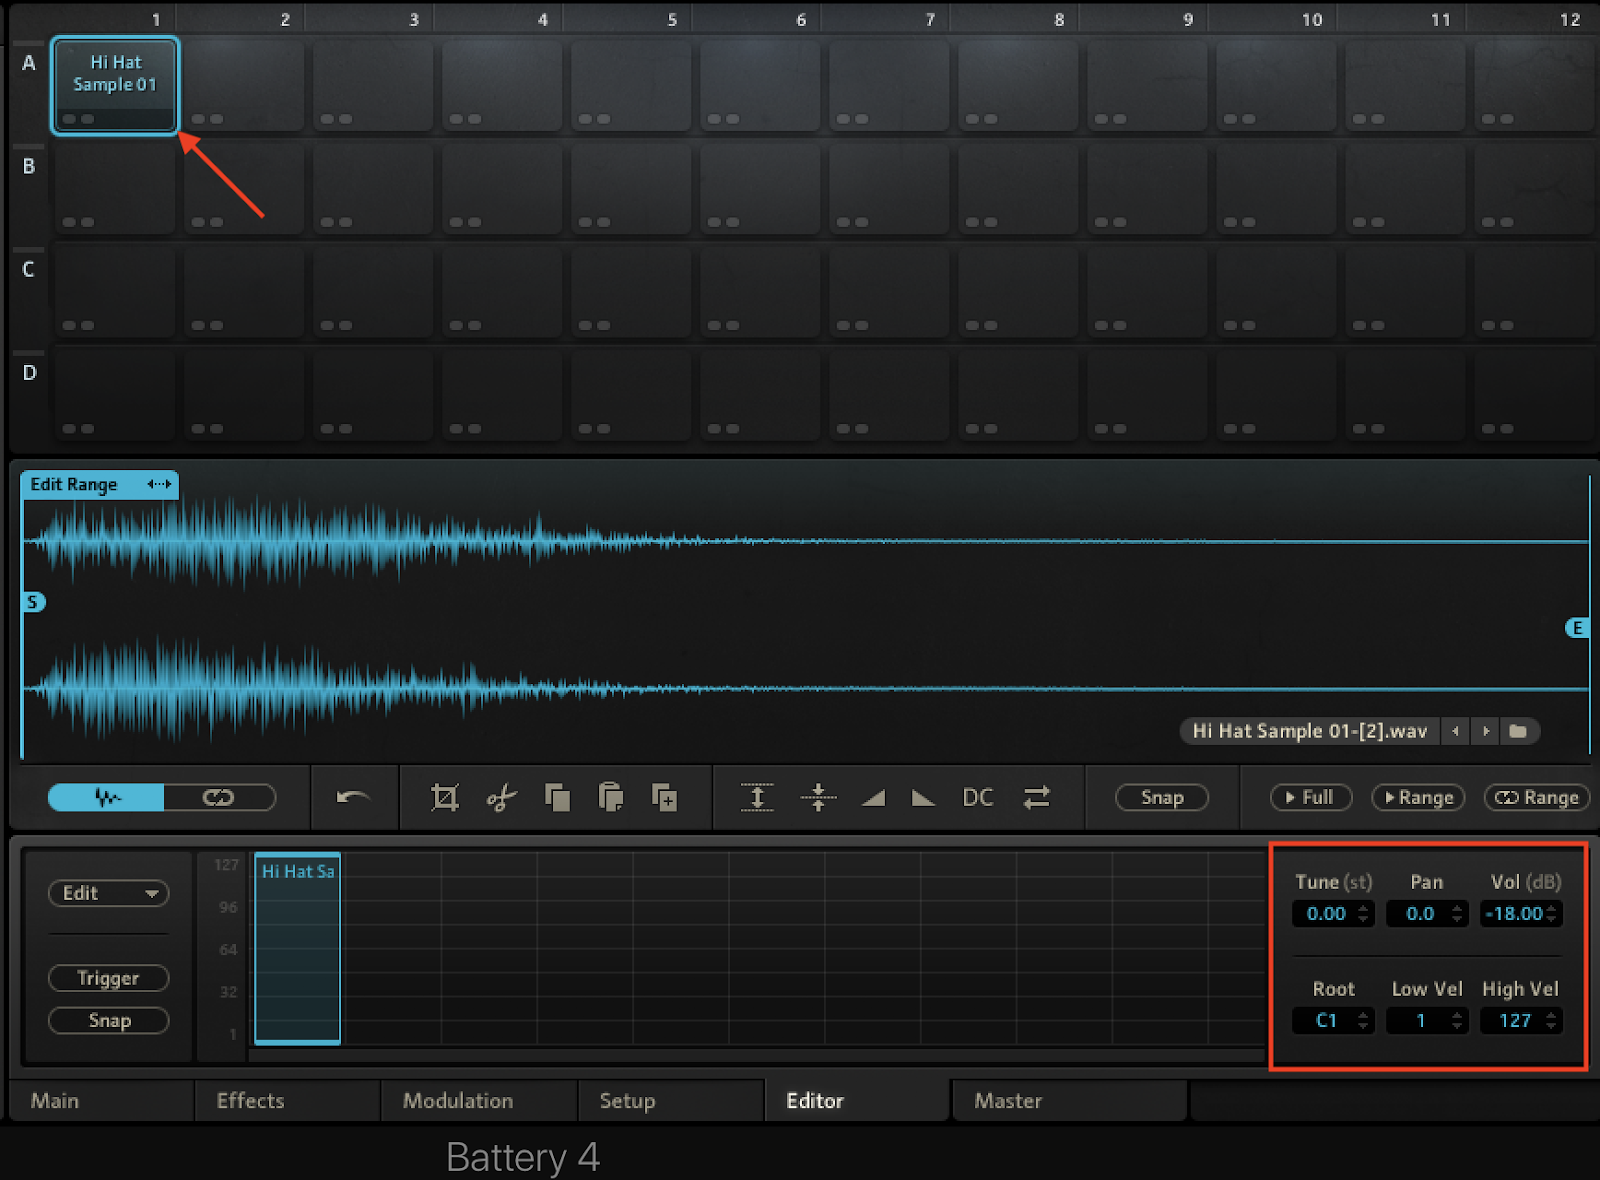
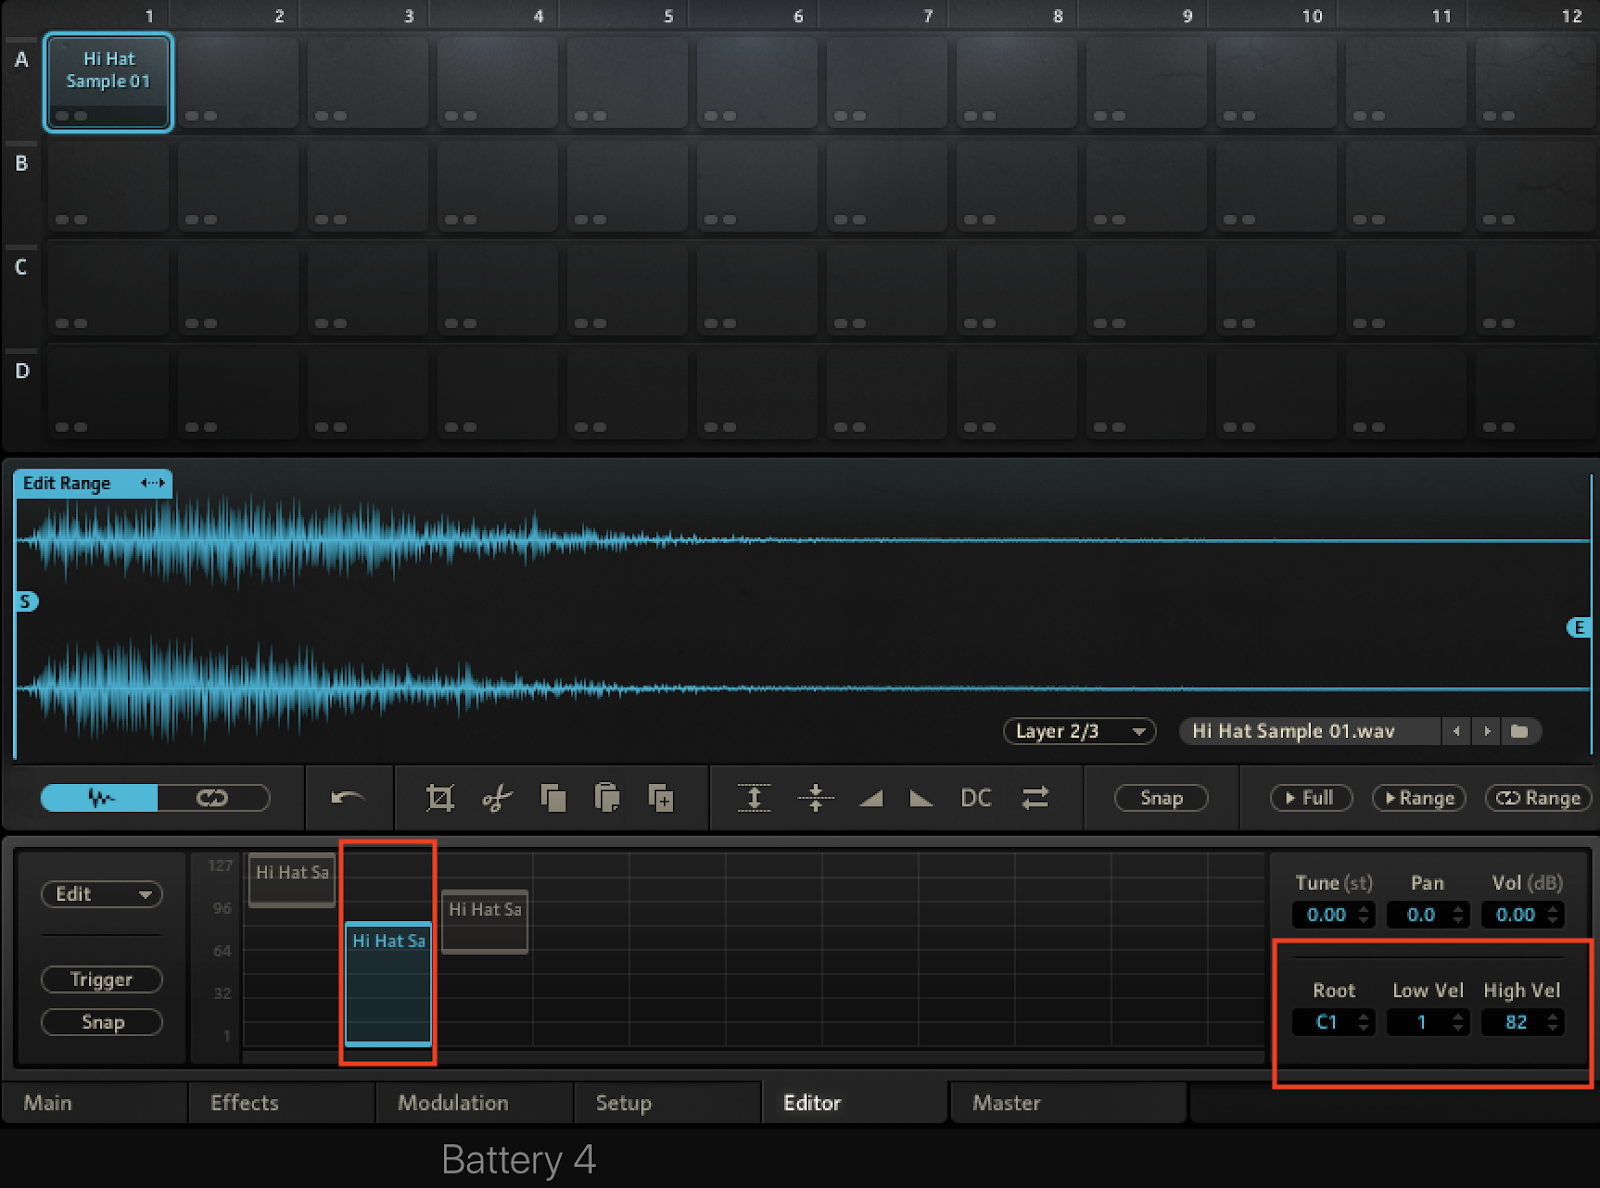
Step 1 - Load A Sample
In your sampler, add a hi hat/tambourine/ride sound of your choice. Take note the key/note that will trigger the sound on your MIDI controller/keyboard. In the screenshot below, I loaded a sample onto C1.
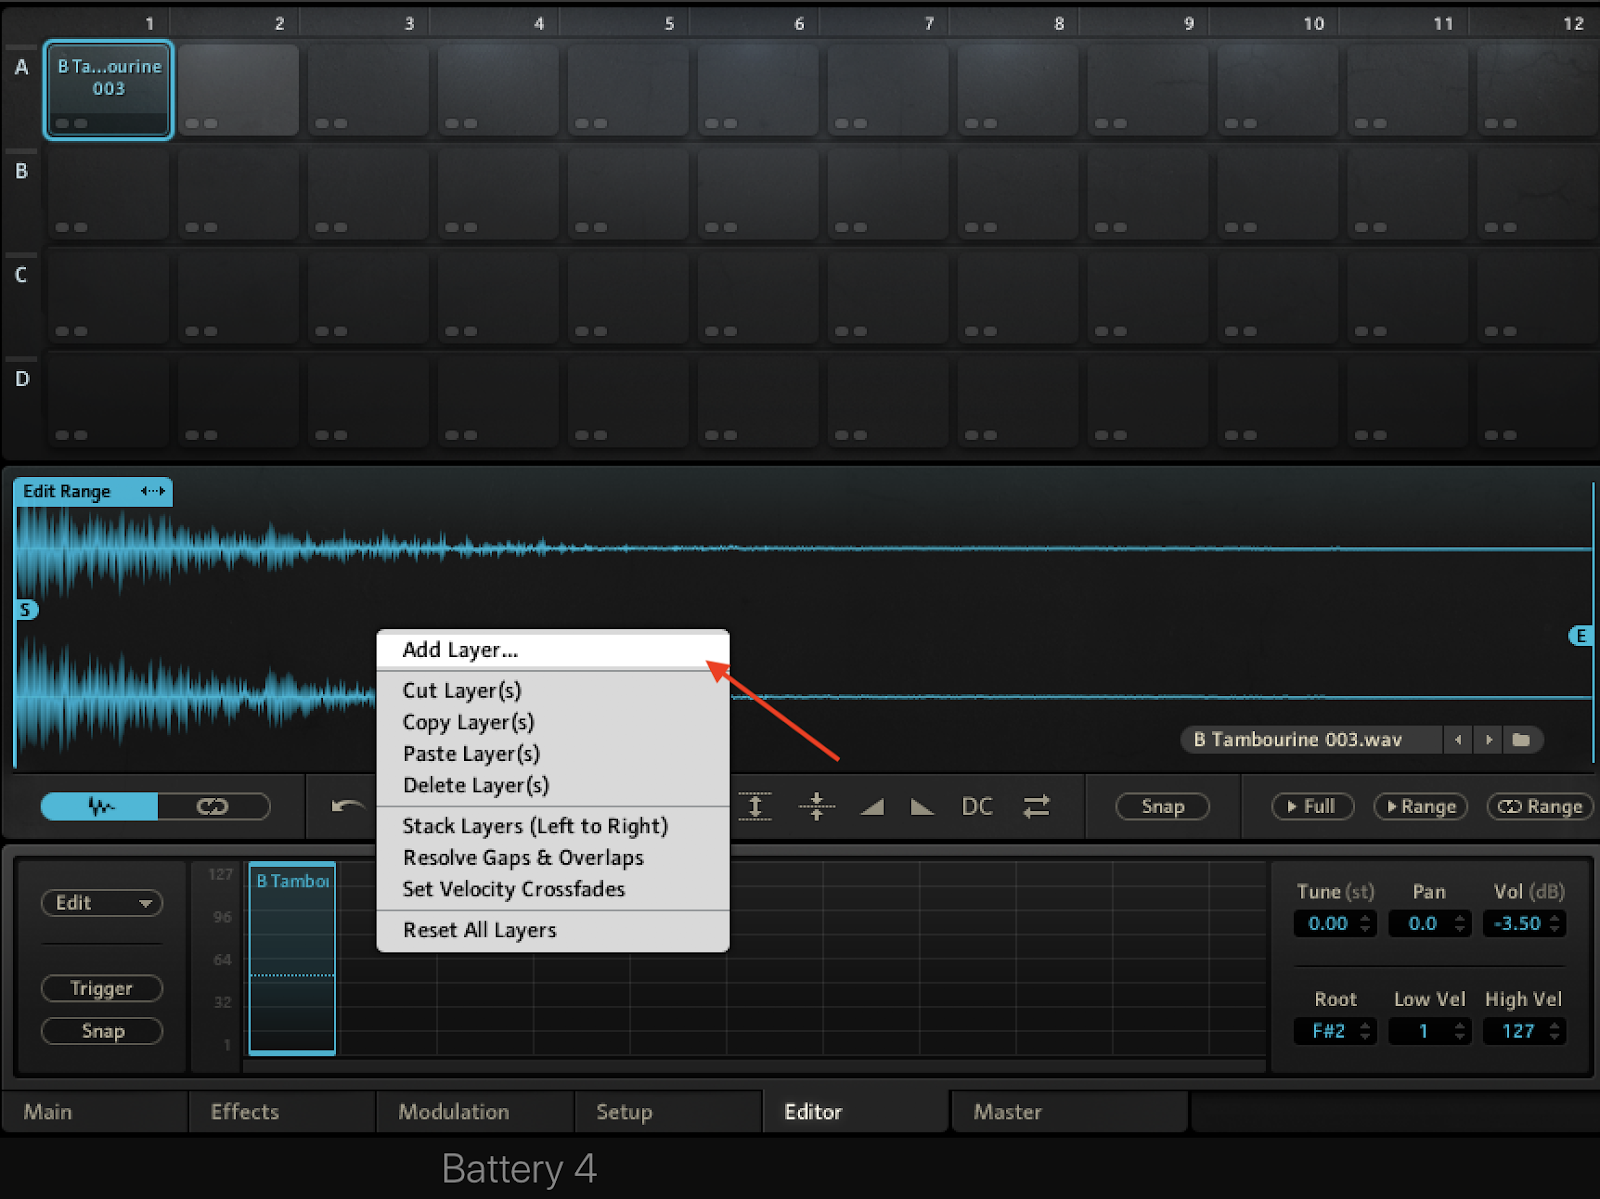
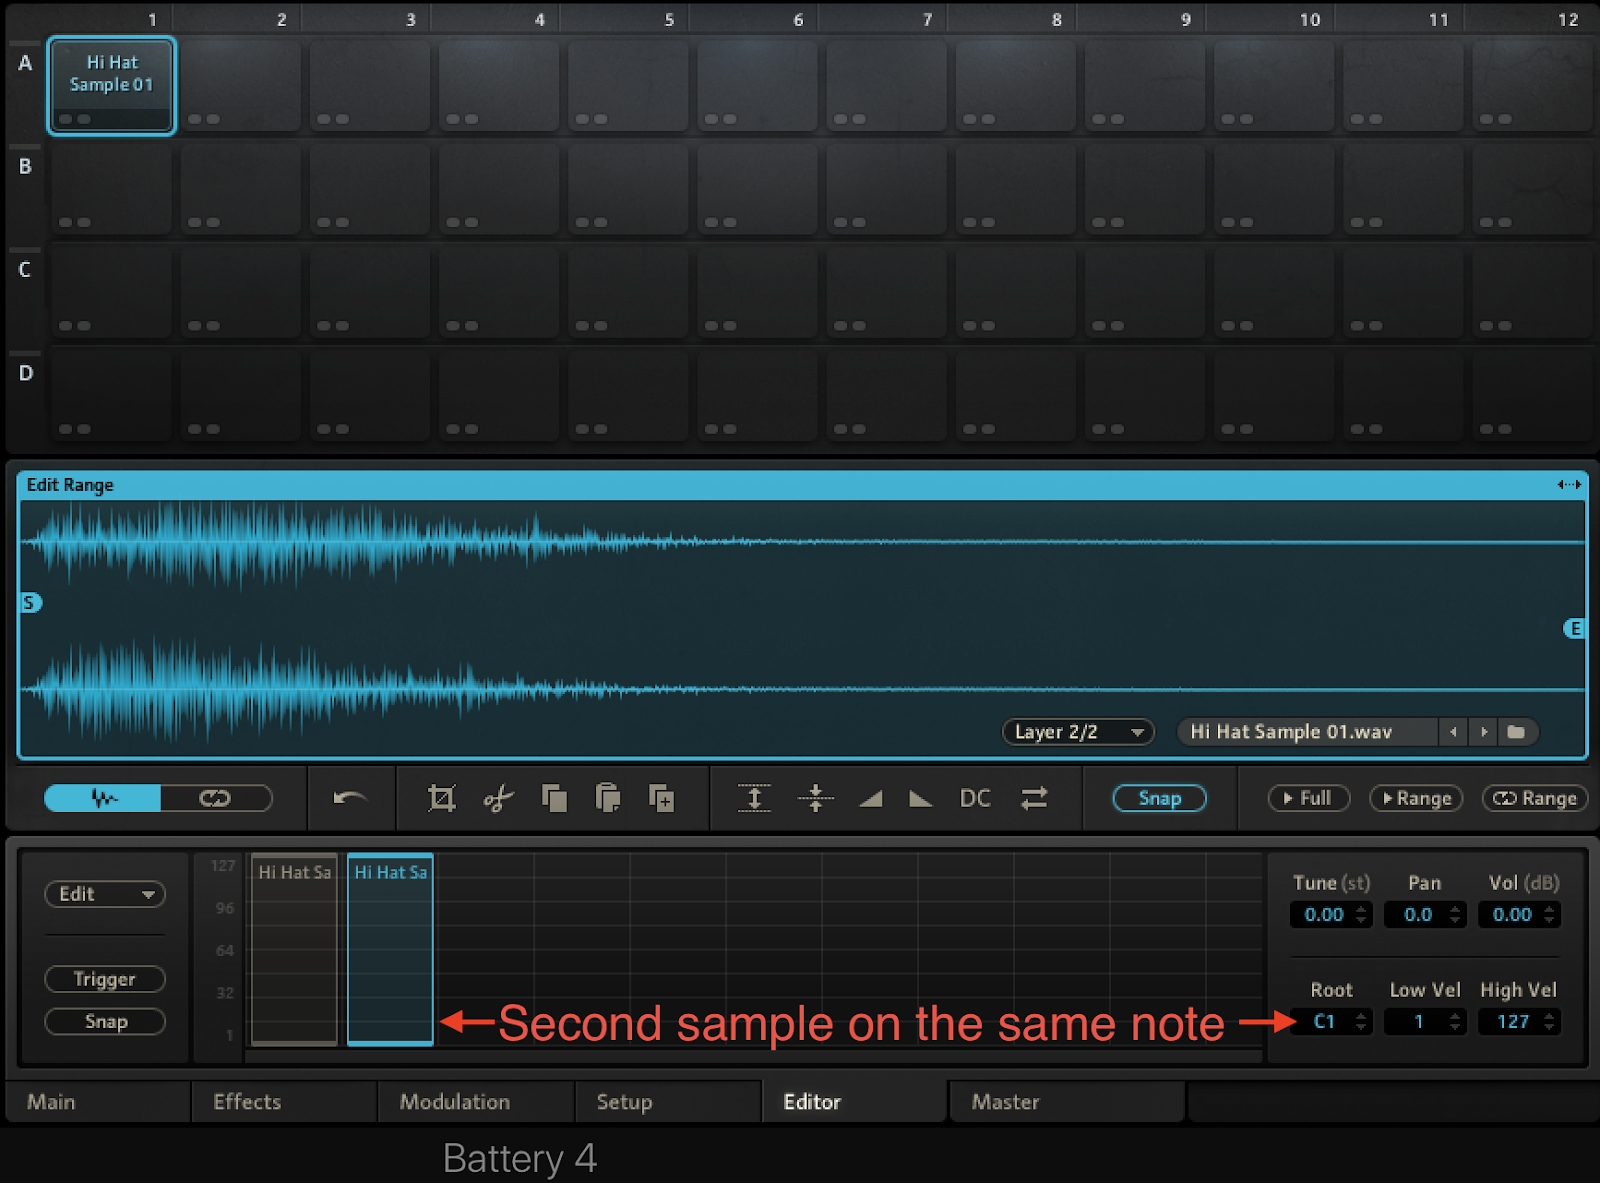
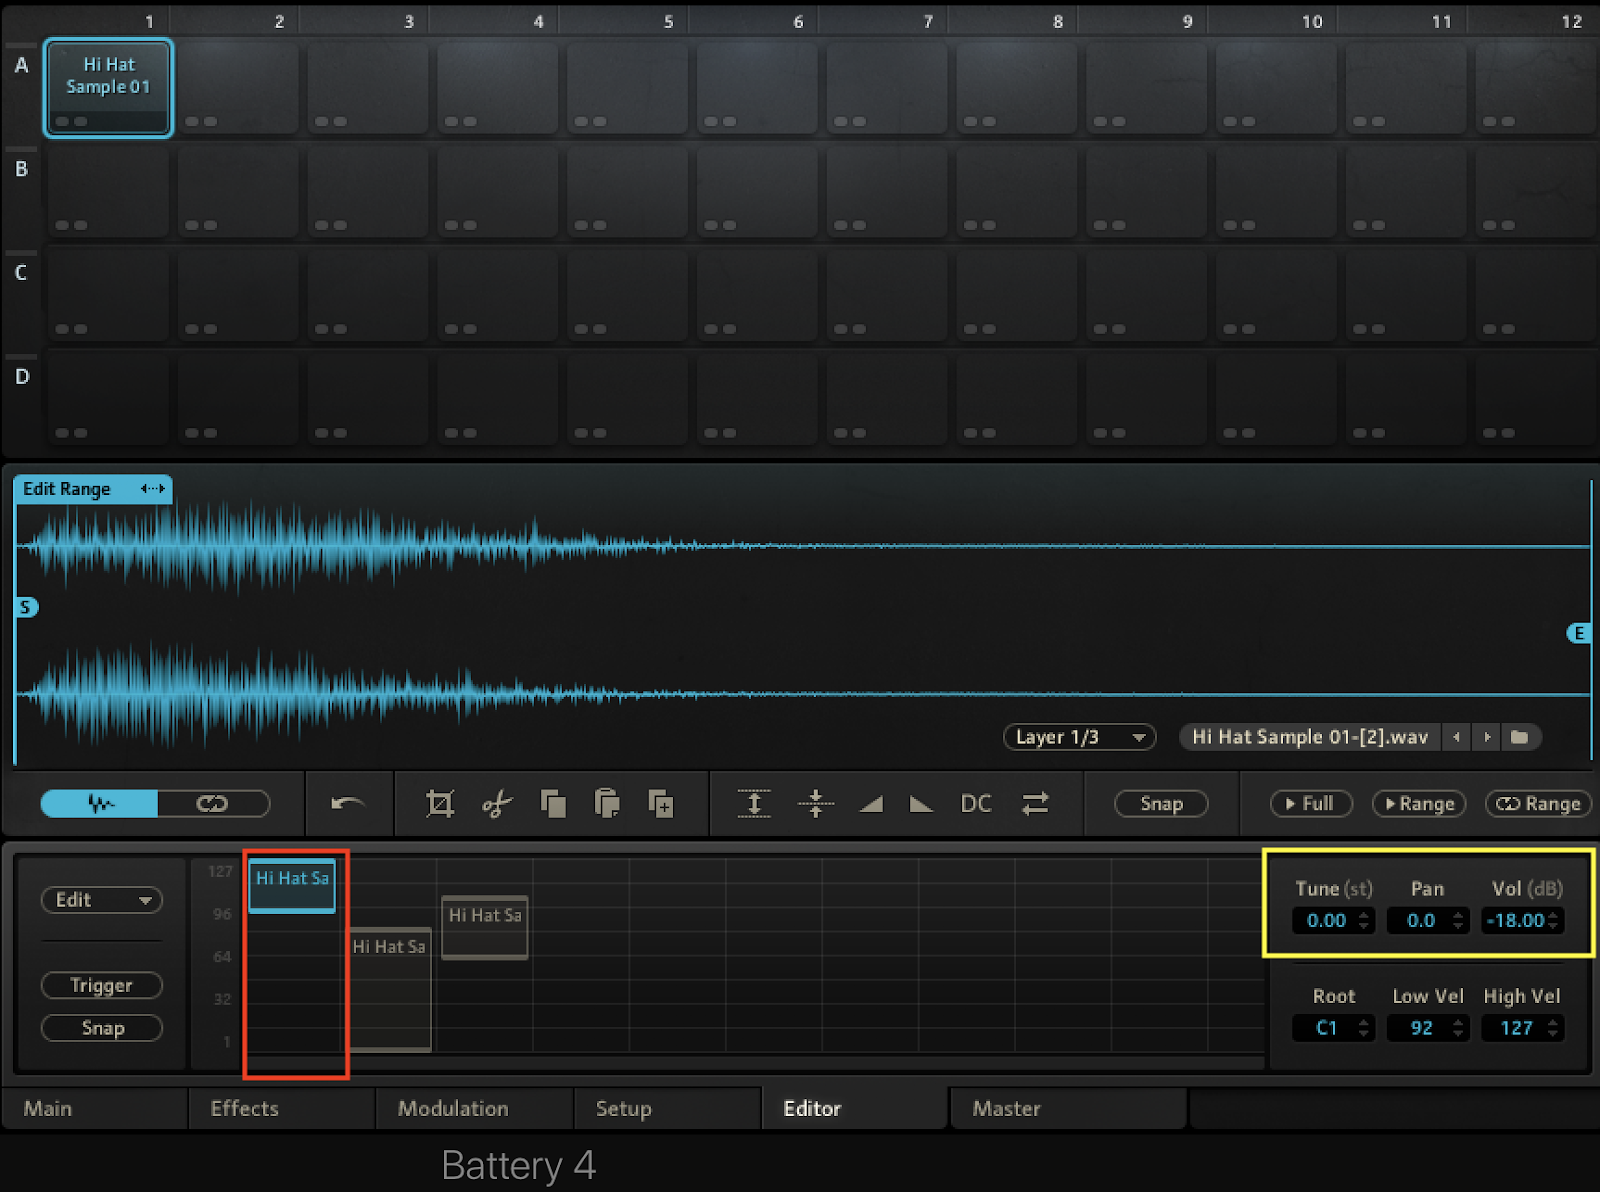
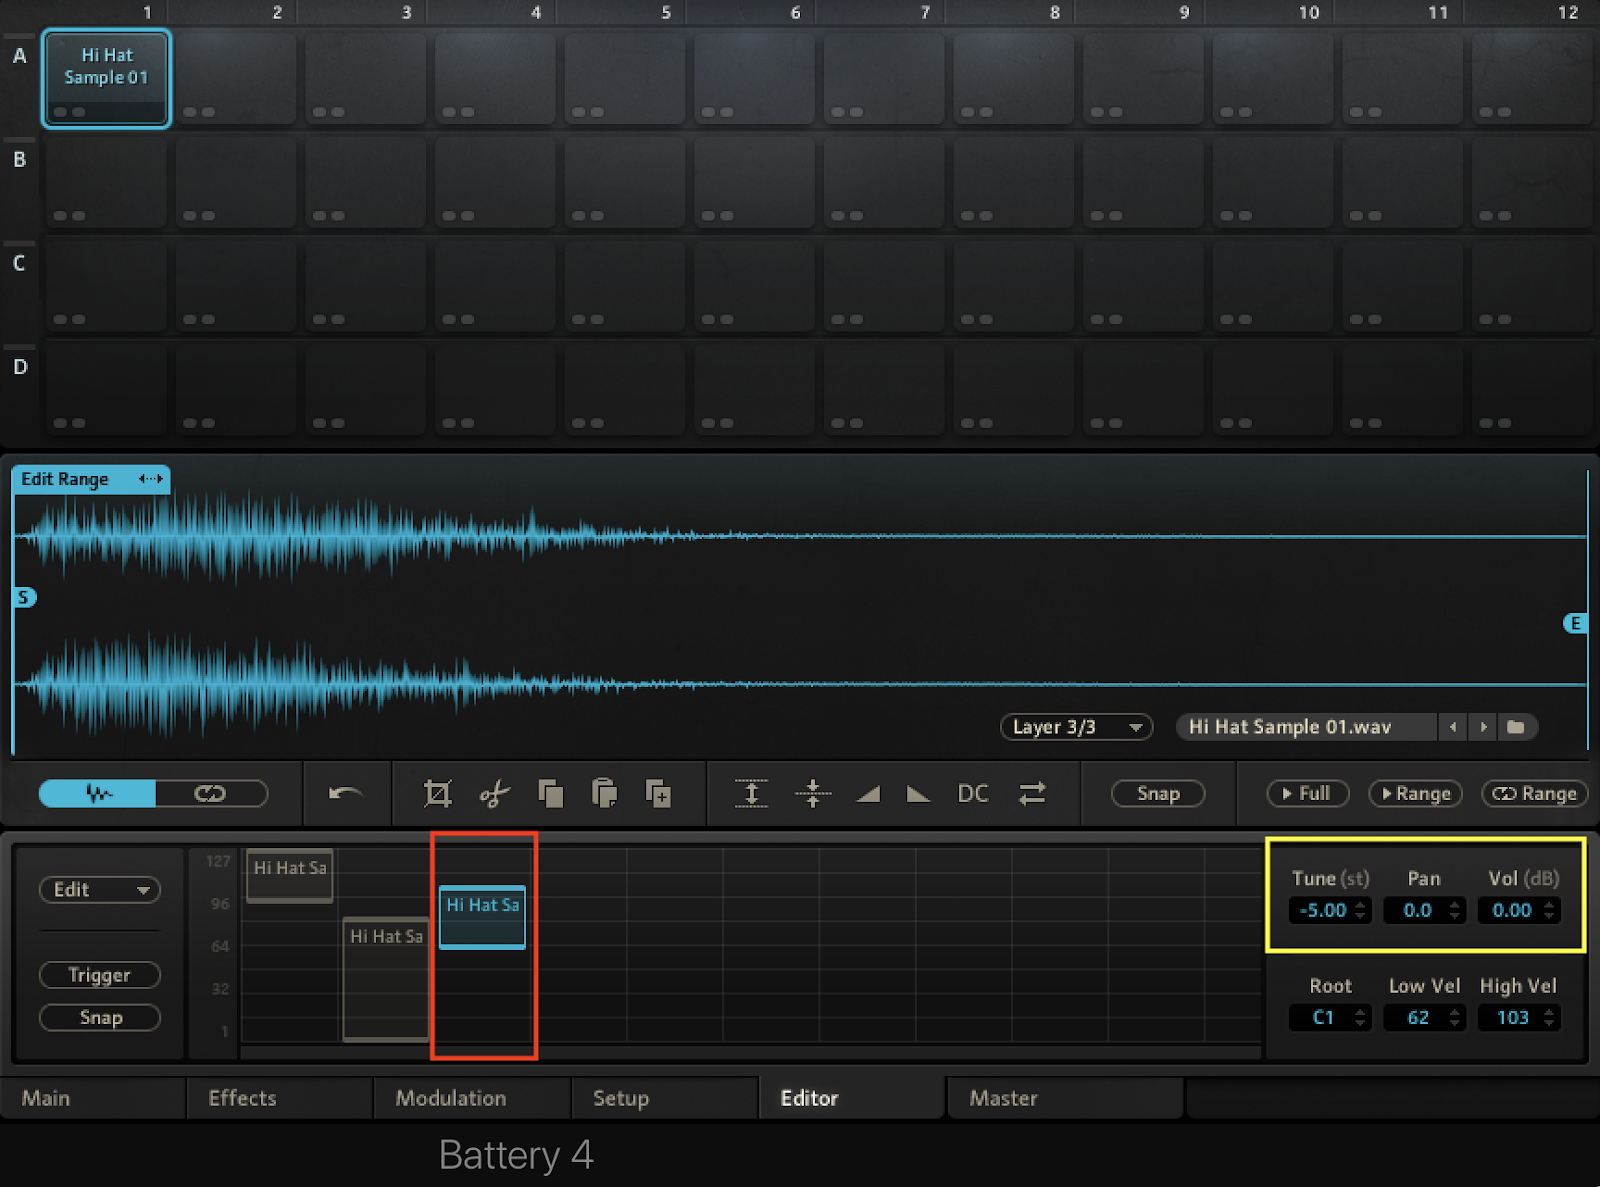
Step 2 - Load a Second and Third Sample
Load a second and third sample onto this same note (C1 in this example).
These additional samples can be the same sound or a different sound.
The first screenshot below shows that I added the second sample as a layer.
The second screenshot below shows that the second sample is also loaded onto C1. The same approach applies to the third sample.
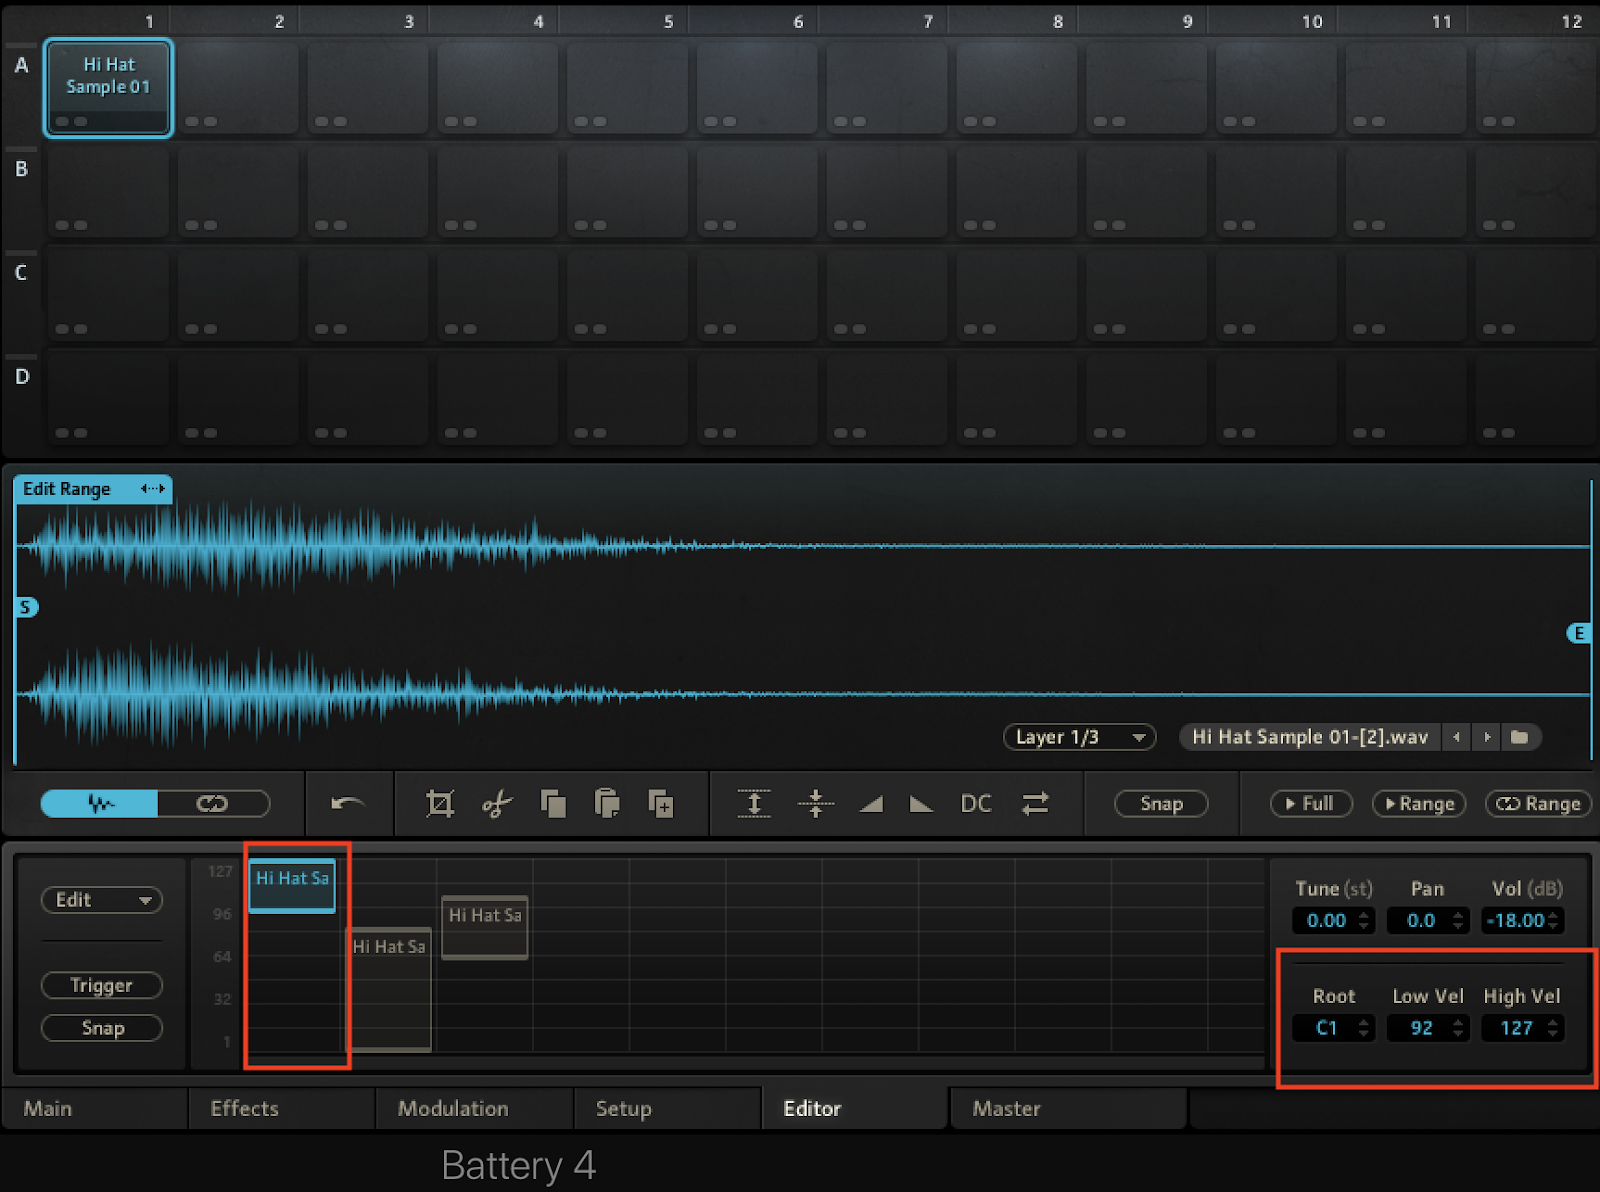
Step 3 - Create Velocity Zones
Create velocity zones so that if:
- the velocity is above a certain threshold (e.g., 90), the first sample will play,
- the velocity is in below a certain threshold (e.g., 70, the second sample will play; and
- if the velocity is in between the thresholds for the first and second sample, the third sample will play (e.g., 60-100).
You can set the velocity zones at whatever values you like.
It’s okay if the zones overlap (e.g., the first sample plays from 90-127 the third sample plays from 60-100).
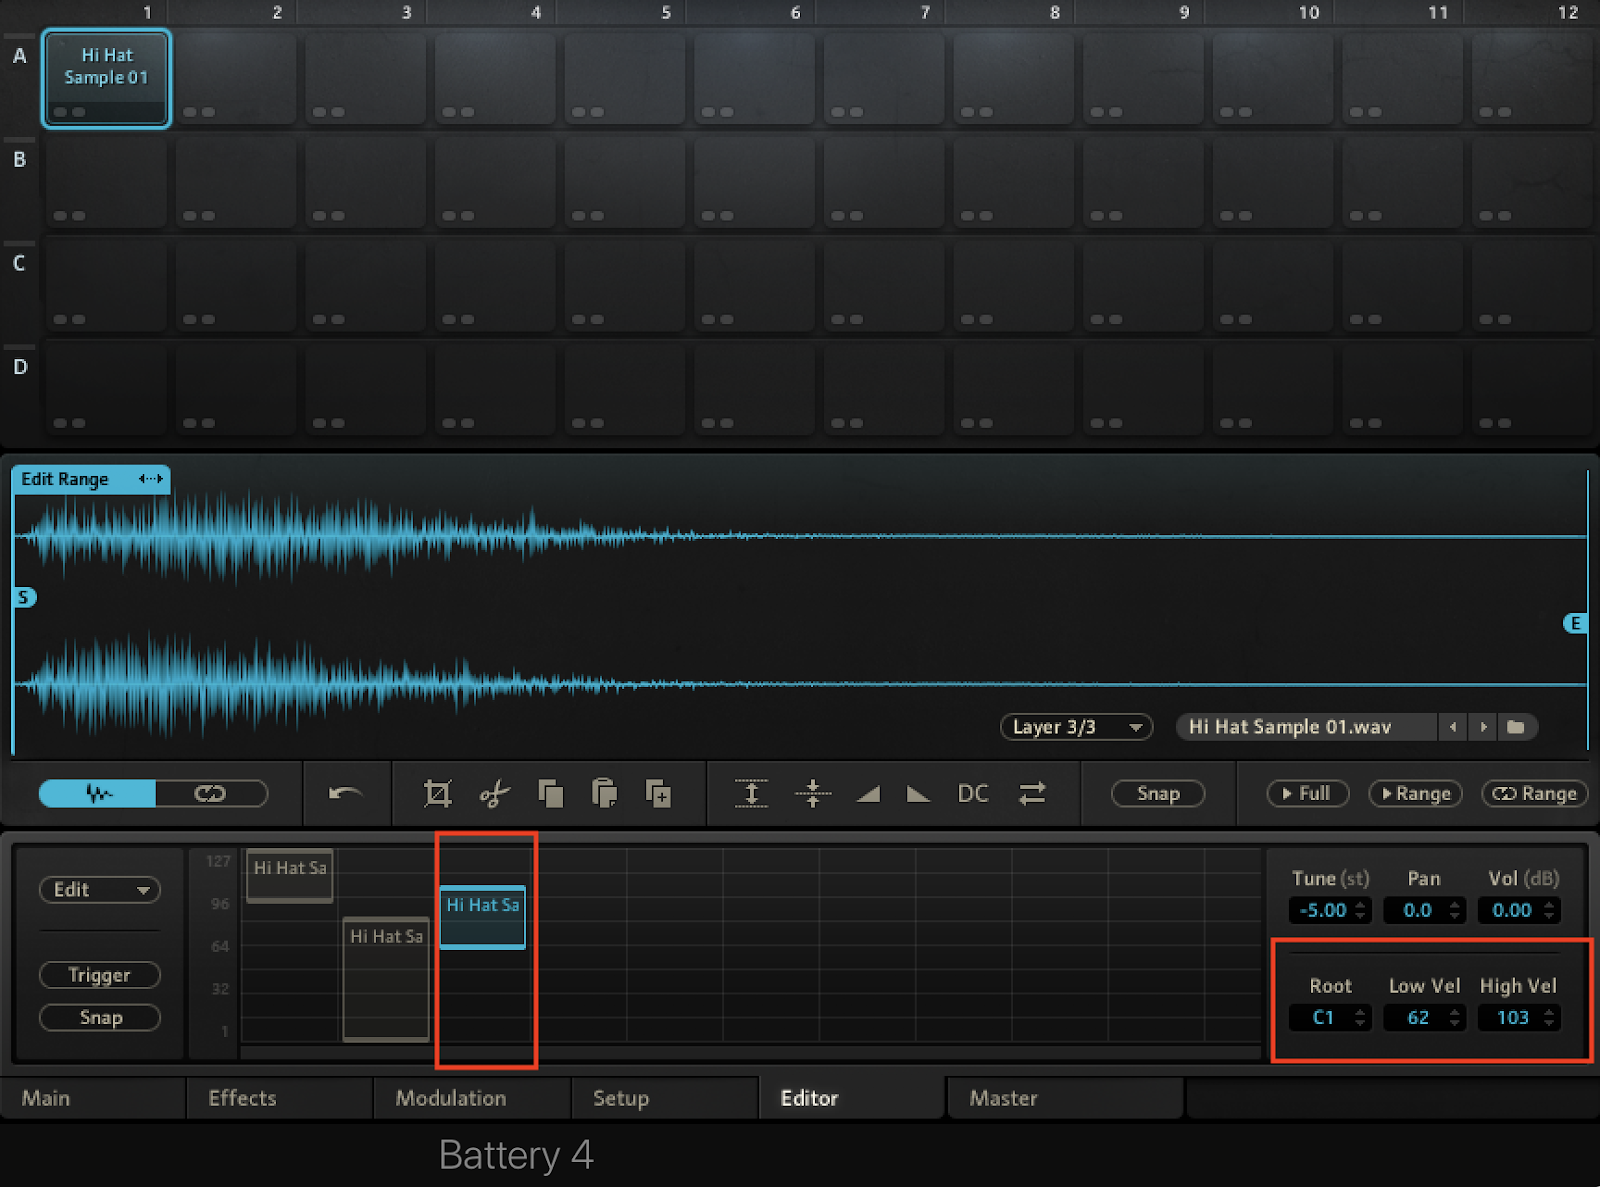
Step 4 - Change the Samples’ Volume, Pitch, etc…
Use your sampler to change one or multiple samples. Change a sample’s volume, pitch, etc…
For starters, try reducing the volume of the first sample (which plays at the higher velocity ranges) by ~10-20db. Then, reduce the pitch of the third sample by 4-5 semitones
In Battery 4, you can also reverse samples.
Save this drum patch/kit so that you can easily access it in future beats.
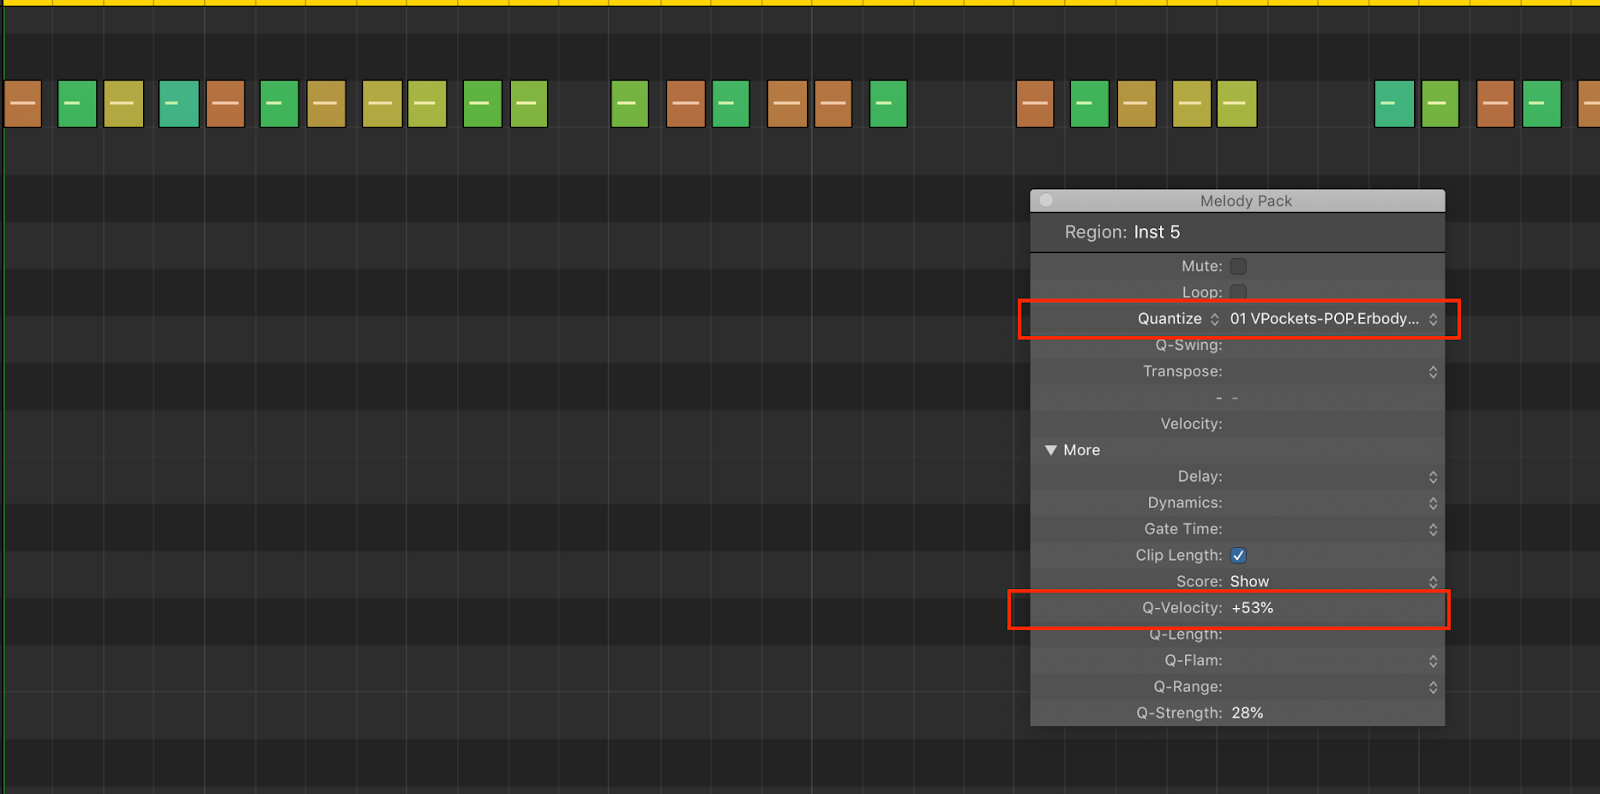
Step 5 - Choose a Groove Builder and Blend in VD4H
Starting from 0, blend in VD4H (velocity) of any Groove Builder while playing your hi hat pattern. You’ll hear dynamic results based on the decisions you make in steps 3-5.
Of course, you can use the timing feature of Groove Builders as well to give your beat swing and take it off the grid.
.
Summary
Here’s a brief summary of the parameters that you can alter to get dynamic hi hat groove and bounce when you use Groove Builders:
- The Groove Builder that you select (e.g., a Pop Groove Builder vs. a Hip-Hop Groove Builder)
- VD4H amount (e.g., 20% vs. 80%) and timing amount (e.g., 30% vs. 90%)
- The number of samples you add to play on a specific note
- Velocity zones
- Sample selection
- Sample modifications (e.g., volume and pitch)
By using the techniques described in this article, you can take your hi hat bounce and drum groove to a whole new level.
If you already have a drum kit with multisample hi hats, use it with VD4H to get awesome results!
Before and After
Here's a quick example that shows the results you can achieve using VD4H and the techniques that I outlined. Groove Builders are also applied to the kick and snare in the 'After' example.
Before
After
START YOUR JOURNEY GETTING THE BEST HI HAT RESULTS HERE!

